


Under normal circumstances, hiring a professional photographer to do your maternity photos is a great idea. But since we’ve been limited as to what we can and cannot do, not to mention all the stay at home orders in place because of the coronavirus, doing DIY maternity photoshoot is most likely your only option to document this special time of your life. Because taking your own maternity photos is something that you cannot reschedule, and has to happen when it needs to happen.
As a pregnant mom during this very difficult time, I did a DIY maternity photoshoot before the stay at home order was in place here in Virginia; and I am really grateful that I did because I was able to document it for our family. Which is why today, I’m going to tell you how to take your own maternity photos. I’m going to share the tips & tricks that I did for my own pregnancy photos so you can document this exciting time for your family too! If you have older kids, I have tips on how to keep them cooperating as well. So read on!

WHAT YOU WILL NEED TO DO A DIY MATERNITY PHOTOSHOOT
Don’t worry, you won’t need a prior photography experience to take your own maternity photos; but you will need the following:
- A big & round belly – It’s best to do your DIY maternity photoshoot as early as 28 weeks if you feel like your belly is big enough to be noticeable in your maternity photos. Your comfort is of utmost importance so I normally suggest to do it when your belly is round, but not too big, so you can still freely move around without being uncomfortable.
- Camera with a timer – You don’t need a professional camera to do a DIY maternity photos. Any camera that has a timer will do, even your phone will work as long as it has a timer.
- Tripod – If you don’t have one (and don’t want to get one), you can do a makeshift tripod. Stack up tables, chairs, books, and anything you can find so you have something to prop your camera on. Something like pictured below will work if you’re doing it inside your home or if it’s not that windy.
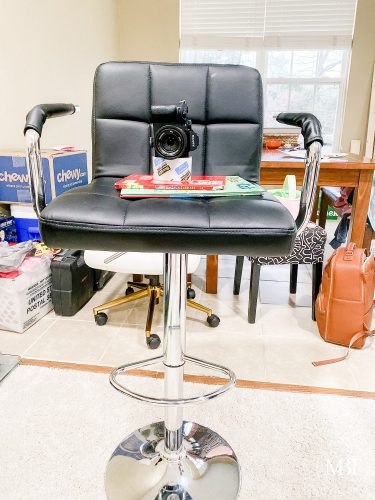
NOTE: Make sure the makeshift tripod is stable so you don’t end up with a broken camera if it ends up being windy.
- Patience – Yes, you read that right! You’re going to need patience… lots and lots of it, especially if you have older kids. You will find out why as you read on.
PLANNING YOUR OWN MATERNITY PHOTOSHOOT
I LOVE planning anything (from family trips to parties), from the biggest to the tiniest details. So I am sharing some tips to make planning your own maternity photoshoot easier & more bearable if you’re not a fan of planning.
1. SCOUT LOCATION OPTIONS
During the stay at home order, there’s really not much option you will have since most parks are closed. Most likely, your only options are your home or somewhere in your neighborhood.
To save you from having to clean your house (because our house is always a mess), check out the options you have in your neighborhood first. In our old neighborhood, there’s a spot that has a lot of greenery 1 mile away from where we used to live and we would always go there for quick photoshoots.
The next time you go out for a walk, be very observant of what your neighborhood has to offer. Find the “perfect” spot to do your DIY maternity photoshoot at. When I say perfect, it doesn’t have to be breathtakingly beautiful; it just needs to be an area with a non-distracting background so you and your family can be main focus.
Below are some examples of what a location option for your maternity photoshoot should look like.
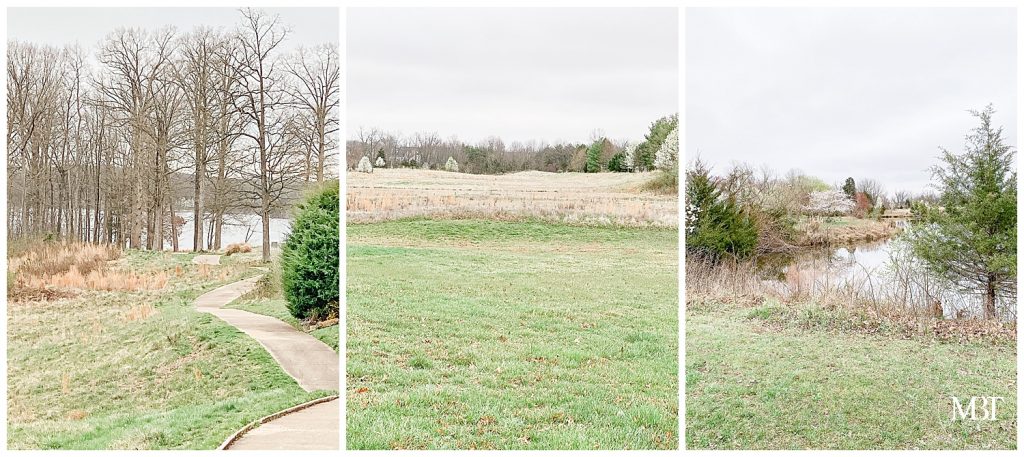
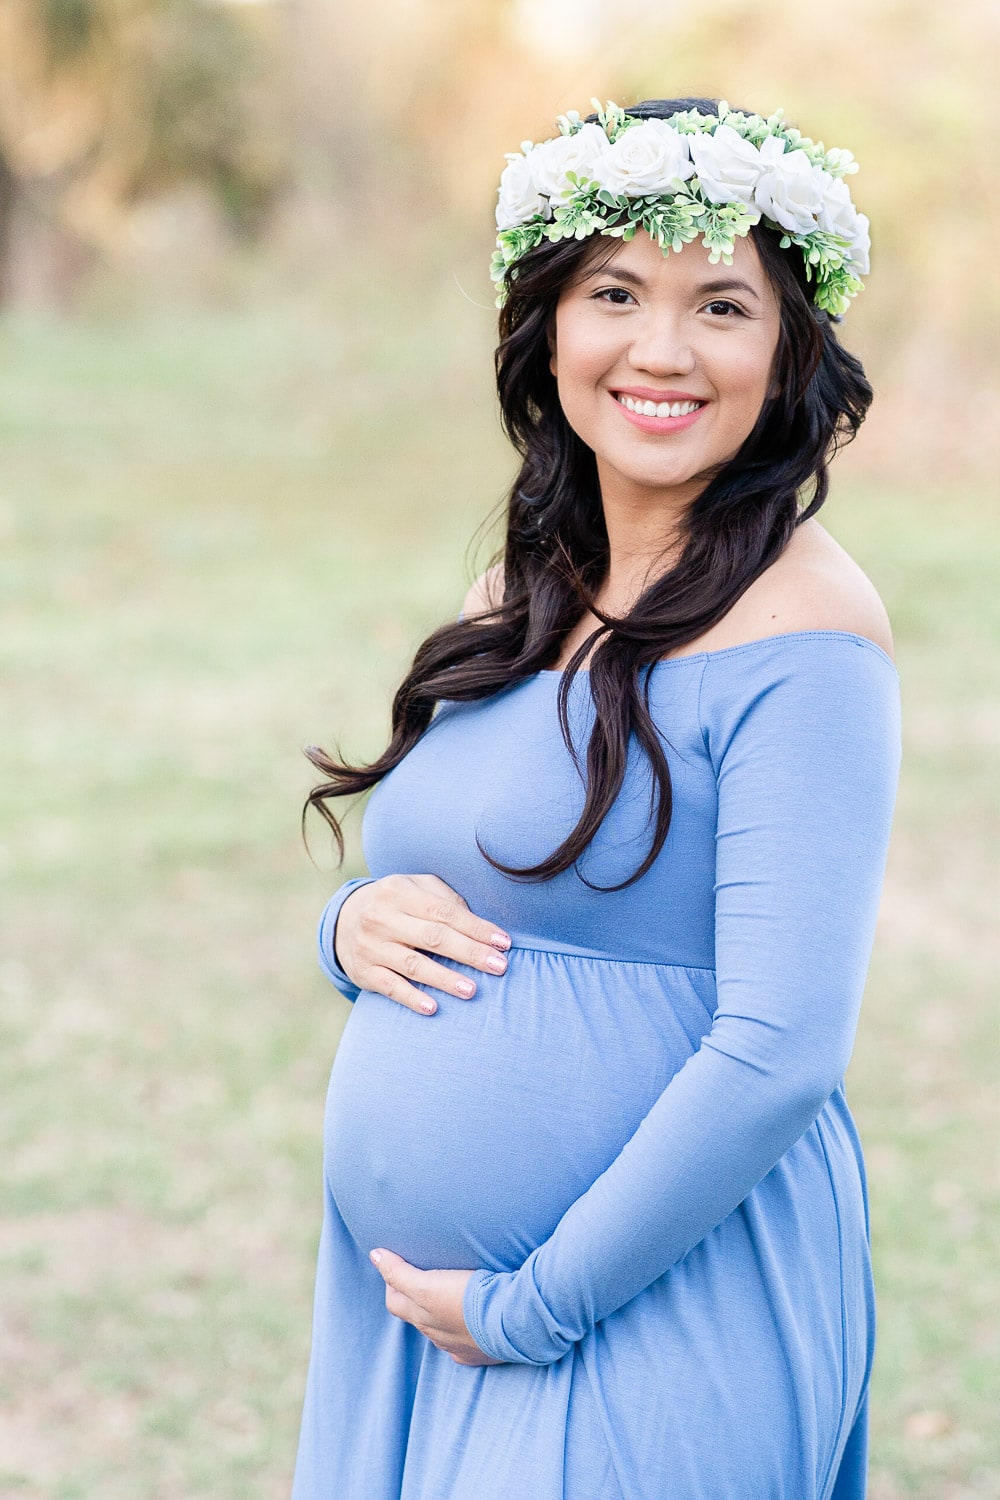
The maternity photo (below) was taken in our neighborhood (third picture above). It’s an area that we just stumbled upon while driving around to see where we can do my own maternity photos at. If you want to view the rest of the photos, check this DIY maternity session out.
But if all else fails, you can always do it at the comfort of your own home. Plan to do it in a room that gets the most light.
2. CHOOSE A DAY TO DO YOUR DIY MATERNITY PHOTOS
When choosing a day for your own maternity photoshoot, consider the following:
If you’re taking your own photos outside:
- What is the weather going to be? Is it going to be rainy or windy? A cloudy day is the perfect day to do it; but a sunny day will work too.
- What will your day look like? Will you have lots of things to do on that day? A relaxed & slow day when everyone (especially you) will not be too tired is ideal. So make sure to plan to do your own maternity photoshoot on a day when you won’t be moving a lot.
If you’re taking your own photos at home, it’s best do it on a sunny day so the room where you’ve chosen to do it in will have as much light as possible.
3. SET THE TIME
Ending up with beautiful maternity pictures is all about the lighting. You may have worn the dreamiest outfits, nailed the perfect pose, and got a shot where everyone was looking at the camera; but if the lighting is bad, you most likely will not love your maternity photos.
If you’ve decided to do your DIY maternity photoshoot outside, the best time to do it is 2 hours before the scheduled sunset. You can go here, enter your city and state, and it will give you the scheduled sunset for any given day. This is what I use for my own sessions and it has been very reliable.
If, for any reason, doing your maternity photoshoot 2 hours before the scheduled sunset is not possible, keep on reading and I’ll share how to still make it work.
If you’ve decided to do your DIY maternity photos at home, the best time to do it is right around the time that your chosen room gets the most light.
4. LOOK FOR INSPIRATIONS
To ensure that you’re going to love your DIY maternity photos, I strongly recommend that you go to Pinterest and look for maternity photos that you love. Screenshot these photos and save them on your phone so you can access them easily on the day of your maternity photoshoot.
Save yourself the stress, and make sure to save at least 3-4 per set (just you, close up of the belly, you & your husband, you & your child/children, the whole family). This way, if you find that 1 of the poses that you like is not going to work during your photoshoot, you have other options to try right on your phone. You won’t need to go to Pinterest and try to find other poses that could work.
5. PLAN THE OUTFITS
What better way to give yourself, your husband, and your child/children (if you have older ones) the perfect excuse to dress up than for your DIY maternity photoshoot, right? Feel free to wear what you already have or shop online! I know I love a good excuse to shop for new outfits.
Don’t forget to think about props that you might want to include in your maternity photos like a flower crown or a statement necklace.
If you need help in planning the outfits for your maternity photos, you can check out my Pinterest board for some inspirations.
PREPARING FOR YOUR MATERNITY PHOTOSHOOT
Now that you’ve planned all the details for your DIY maternity photoshoot, it’s time to get everyone prepared for what’s about to come. Here are some tips & tricks to ensure that everyone is as prepared as you can for your big day.
1. SET YOUR CHILD’S EXPECTATIONS
If you have older kid/s, I highly suggest setting his/her expectation on the days leading up to your DIY maternity photoshoot. Talk to him/her about what’s going to happen. If you have a target number of pictures to do, it would help to let him/her know as well like “We will only do 2 pictures of you & Mommy, 3 pictures of all 3 of us, and 2 pictures of just Mommy & Daddy, and 4 pictures of just Mommy” so he/she knows what to expect.
It also helps to promise him/her a reward after the photoshoot if he/she cooperates. Maybe a toy or food that he/she can pick out himself/herself.
Keep on reminding him/her every other day about what’s going to happen to make sure that he/she knows what to expect. It’s totally up to you how often you want to do it; but the key is to make sure that his/her expectations are set.
3. THE NIGHT BEFORE YOUR DIY MATERNITY PHOTOSHOOT
On the night before you take your own maternity photos, make sure to do the following:
- Make sure everyone sleeps early so everyone is refreshed and would look their best during the shoot.
- Iron everyone’s outfits for the shoot. Wrinkly clothes will take the focus away from what really matters – you & your family.
- Prepare to run a lot the next day (you’ll see below why).
4. HOURS BEFORE YOU TAKE YOUR OWN MATERNITY PHOTOS
Before you take your own maternity photos, make sure to do the following:
- Make sure to give yourself enough time to do your own hair & makeup so you will look fabulous in your maternity photos. If you need 4 hours to do everything, plan your day so that you can have the time that you need so you’re not rushing and you will not be stressed.
- If you have older kid/s:
- Make sure he/she has taken his/her nap before the photoshoot so he/she isn’t cranky.
- Make sure he/she has eaten his/her snack before your photoshoot so he/she’s happy & most likely to cooperate.
- Make sure you have his/her favorite toy or snack readily available during the photoshoot just in case he/she needs a little break. Make sure the snack isn’t dark colored that would stain his/her face or his/her clothes. And don’t forget to bring wipes to keep his/her hands and face clean.
- Expect to take a lot of breaks in between because he/she will most likely need a lot.
- Quickly remind him/her on what will happen when you’re on location (or on your way to the location) just to set his/her expectation.
THE ACTUAL DIY MATERNITY PHOTOSHOOT
It’s here!!! The day you’ve been preparing for! The day you’re going to take your own maternity photos! I am very excited for you!!! Make sure to follow these tips below to ensure your DIY maternity photoshoot runs as smooth as possible:
Note: You will only need your tripod for pictures where the entire family will be present.
- When taking your photos outside, make sure that the sun is either behind you or on the side (especially when the sun is really harsh), but never in front of you (unless the sun is setting).
- If you see some sun flares on your photos (and you don’t like that effect), move your camera’s angle a little bit so it doesn’t show anymore.
- When taking your photos inside your home, turn off indoor lights to avoid any unflattering colorcast and use as much natural light as possible.
- Make sure to face towards the window or door where the light is coming from. If the light coming in is too much, move a bit further away from your light source until your pictures aren’t turning out to be too bright.
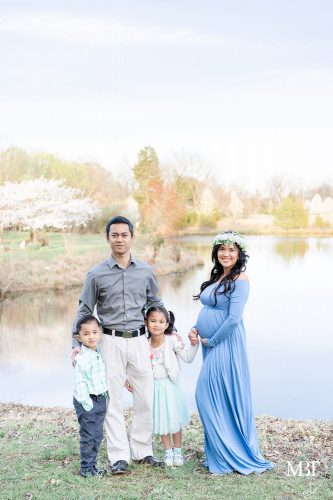
- If you have older child/children, begin your DIY maternity photoshoot with them while they’re still in a good mood. Start with photos where they will be the focus of (like a picture of them with just the belly), then move on to the photos that don’t focus them as much.
- For photos of just you, your belly, and you with your child/children, show your husband a picture of the pose that you’d like to do. Hand him the camera, do the pose, and have him take the picture. Once he’s done, review the picture/s he took, and re-try again if you aren’t satisfied.
- For each pose where the entire family is present, show your husband a picture of the pose that you’d like to do. Have him help position your kid/s (stand beside him/her or hold him/her). Pay attention to how the pose is exactly done (where each one should look, where each one should be facing, etc.). Once they’re getting ready for the shot, go to your camera, set it up, and make sure the timer is on. Once they’re in position, the camera is ready, click the shutter, RUN AS FAST AS YOU CAN and do your pose.
- As soon as your camera has taken the picture, check it out. Review what went wrong and try to correct it. If it helps to show your husband the picture so he knows exactly what to do for the next try, don’t hesitate to do so.
- NOTE: If you have a camera that takes multiple photos in a span of 3 seconds, that would be a way better option so you have options in case someone blinks.
- You need to know that 1 pose will take several attempts to perfect, or sometimes they might not be that perfect especially if the older kids are too young to understand your directions. So you’ll have to decide if that’s good enough for you or you’d like to try again.
- If you’ve tried several times but cannot seem to achieve the pose that you’d like to do, it’s okay to move on to the next one.
- NOTE: Your target to finish everything in 30 minutes (assuming that’s your target) might not be feasible, so make sure to set your expectation so you don’t end up stressed.
- Even if your child promised you that they will follow all of your instructions during the photoshoot, expect that they will not. He/she will either be too hot, too cold, hungry, or is done.
- If your older child is acting up, prepare to take a break. Let him/her run around for a few minutes or let him/her eat snack (but make sure to wipe his/her face and hands immediately after) and then take your pictures again.
If after you’ve tried everything and it didn’t work out as well as you had planned or the pictures didn’t turn out as beautiful as you had hoped, give yourself some grace & a pat in the back for trying. That’s totally okay! Sometimes those not-so-perfect pictures would turn out to be my favorite because they exactly reflect what real life looks for us at that exact moment.
I hope you found these tips & tricks helpful! If you decide to do DIY maternity photos and have followed my tips & tricks above, I would absolutely LOVE to see your photos! Please share them on Instagram and tag @tubellephotography.
If you enjoyed reading this post, don’t forget to pin it!

‘Til next time,
Belle


I love the dress in this picture. Do you know where you purchased it from?
Hi Brandie,
It was from PinkBlush. 🙂